Let unregistered users upload files to your Concrete5 website

What is absolutely amazing about concrete5 is how much it can accomplish out of the box when other CMS would require several extra third-party plugins. Case in point, let’s add a form to your site and allow even unregistered users to upload files straight to your file manager. You’re going to learn about permissions, file sets, file folders, and a few other useful tricks.
Deciding where to put your uploaded files
Concrete5 offers 2 ways of organizing files in your file manager: file sets and file folders. File sets have been around forever and folders were introduced in version 8.
The differences between file sets and folders we are interested in for this tutorial are related to permissions and organization.
- Folders can have their own set of permissions while file sets respect whatever permissions apply to the file they contain
- Folders visually organize files in the File Manager while File sets don’t (unless you filter your files by a file set)
- Files can belong to as many file sets as you want but can only belong to 1 folder
- Folders can be nested while file sets can’t
- Very important: the File Manager itself is, for all intents and purposes, a folder
Our purpose is to let guest users upload files. This is forbidden by default so we’ll have to set permissions. That means we must select a folder to put out files in. And remember the File Manager itself is also a folder.
If you’re using the Legacy Form block the File Manager will be your folder and you can select if you want to add your files to a file set or not.
If you use the Express Form block you will be able to select a folder and a file set.
Personally I favor using Folders for pretty much everything because they keep my File Manager neat and organized but you can choose to leave everything at the root of the File Manager if you prefer.
If you are using Concrete5 8.4.0 and above and are expecting users to upload images, I suggest you also select a file set to add your files to. Concrete5 has an automatic image resizing mechanism that will create differently sized thumbnails from your images as soon as they’re uploaded. That can take up valuable server space. Starting from version 8.4.0, that mechanism can be limited by file sets.
So, in summary, you must select a folder—including the File Manager itself if you prefer— and you may select a file set to control how many thumbnails are created from uploaded images.
Creating file sets and folders
Creating folders and file set is an easy process. If you already know how you can skip ahead, otherwise read on.
To create folders navigate to the File Manager and simply click on the link labeled “New Folder” just below the search box. Give your Folder a name, save, and that’s it.

To create file sets, click on the link labeled “File Sets” (how original) from your right-hand side menu. You’ll be taken to a new page where you should click on the link labeled “Add File Set” just below the search box. Then give it a name and save.

Creating file sets and folders is as easy as it gets so let’s move on.
Setting up permissions
As I explained above, permissions are set directly on folders or on the File Manager—also a folder. Between the File Manager and folders, only the location of the settings is different.
For the File Manager, navigate to System & Settings ⇒ Files ⇒ File Manager Permissions from the dashboard’s right-hand side menu.

Important: if you are using the Legacy Form block, you must set permissions on the File Manager itself.
For folders, permissions are accessed from the File Manager.
As the K.B.O. (King of the Blooming Obvious 👑) in my castle, I’ll have you know that folders are indicated by a folder icon… 😏

To set permissions on folders, just right-click on one and from the drop-down menu select “Edit Permissions.”
A popup appears.

The first thing you’ll want to do is click that big “Override Permissions” button at the top. That will allow you to set permissions on the folder independently from the permissions set on the File Manager itself.
Once you click it, all permission types will become clickable links.
The following steps are exactly the same for folders and for the File Manager.
We want to modify the “Add File” permission to include the “Guest” user group to it the same way the “View Files” permission does by default.
So click on “Add File” and a new popup will appear.

Click on the “Add” button at the right of the “Included” header. Another popup appears.

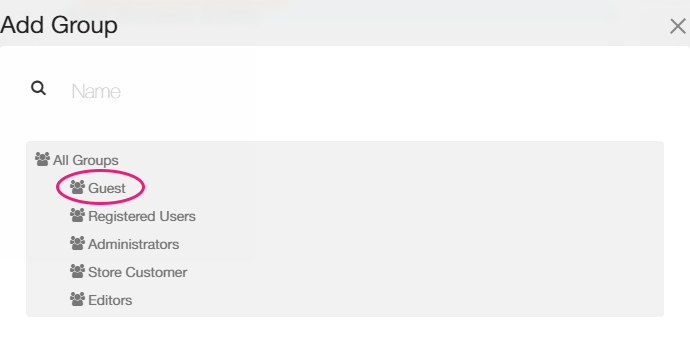
From the “Select” drop-down click on “Group” and yet another popup appears.

From the “Guest” closes automatically and you’re back to the previous one. Wait a few seconds until you can see the “Guest” group name appear.

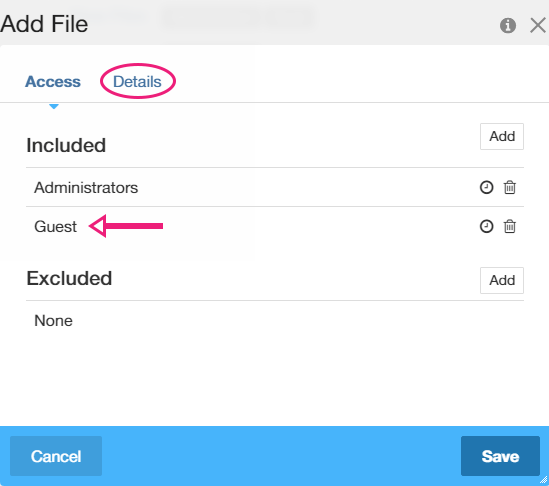
Make sure you click “Save” which will take you back one popup. Again wait a few seconds until you see the group “Guest” appear in the list of included groups and users.

Now switch to the “Details” tab.

We want to limit the file types our unregistered users can upload so from the “Guest” drop-down select “Custom” and save.
Don’t worry, you’ll get to select the file types I told you about very soon.

Now that you’re back at the first popup you can check that your “Guest” user group was added correctly to the “Add File” permission.
Click on the “Add File” link again to go back to the popup where we wanted to select the authorized file types.

Go back to the “Details” tab and now, below your “Guest” label you can see a list of available file types. Check the ones you want to authorize.
For instance, if your guests are uploading their resumes you can check doc, docx, and pdf. For images select jpeg, jpg, and png and probably not gif.
Finally, save which will take you to our previous popup where you must save one last time and that’s it, your folder—or File Manager—permissions are set.
Two things to keep in mind:
- You could have used the same process to grant permission to upload files to any users or user groups.
- Setting permissions on the File Manager itself means the same permissions will apply to all folders that don’t override the File Manager permissions.
Adding the form
If you are using the Legacy Form, select the “File Upload” input type, select an optional File Set, and call it a day. That’s all there is to it.
And again, with the Legacy Form, you must set permissions on the File Manager itself.
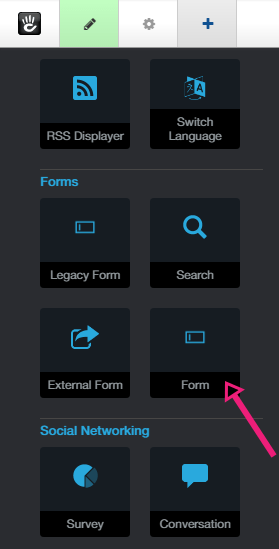
If you’re using the Express Form block, simply called “Form”, you have more flexibility.

Add the form to the page and in the settings’ popup add a question with answer type “Image/File.”
Very important: set the input format to “HTML Input” and not to “File Manager Selector” or uploading files will fail.

Finally, switch to the “Options” tab and, at the bottom, select the folder you set permissions on and optionally a file set.

Bonus tips
Obviously you can add as many file upload inputs to your form as you wish.
But for those times where you’re not sure how many files your users will want to upload, you may want to have a look at the Multi Html File Selector package by user fabianbitter. It will add a new attribute to your site that you can use in your forms instead of the default “Image/File” attribute.
You can also follow the exact same steps to allow registered users to upload files. All you have to do is add them all to a user group and grant that user group permission to add files to the manager or a folder.
But in a case like that, you might want to know which user submitted your form. You can ask for their email of course but there’s no guaranteeing they’ll provide the same email they used to register.
For that you can get my own package Hidden Data Attributes for Express.
It will also tell you which page the form was submitted from—indispensable if it exists in a global area.
It can save the date and time and let you gather plenty of useful pieces of data automatically and transparently without the submitter’s input.
Amazingly enough, the end of this shameless plug 😊 also marks the end of this tutorial. But feel free to reach out (information below) if you have any questions or want to shower me with praise.


